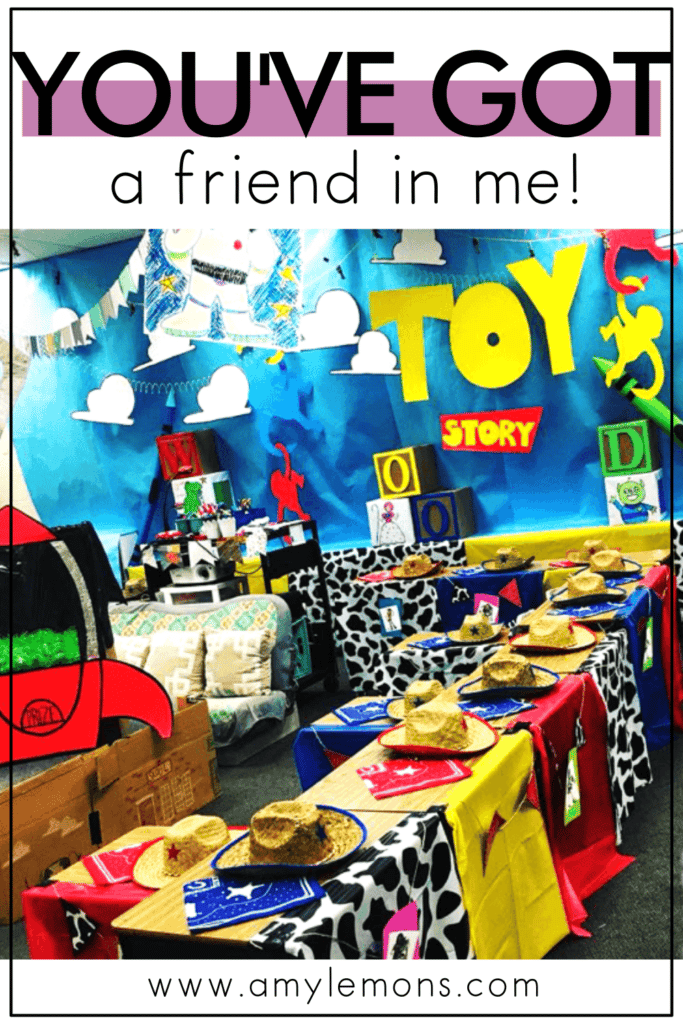
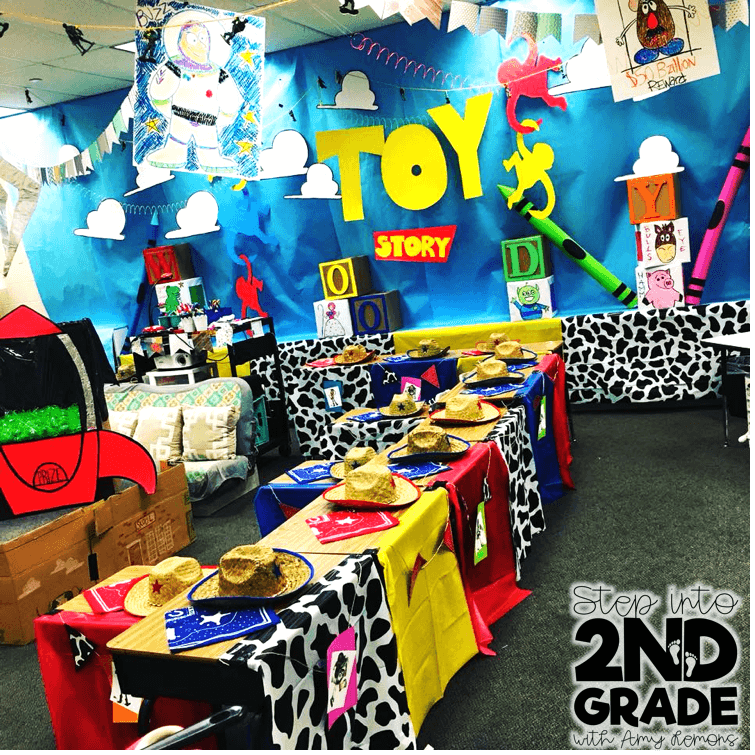
Have you ever done a room transformation in your classroom? Before last week my answer to that question was NO! That surprises many people because I am best friends with Hope King and she is the QUEEN of purposeful and engaging room transformations. I wanted to stretch myself, so I helped Kori and Chelsey transform their 2nd grade rooms. We all worked on coming up with the ideas, content, and components for months together. Today I’m going to walk you through how we did this on a budget!
First of all, I know when you first look at it, it looks as if a ton of money was spent. BUT that just wasn’t the case….looks can be deceiving!
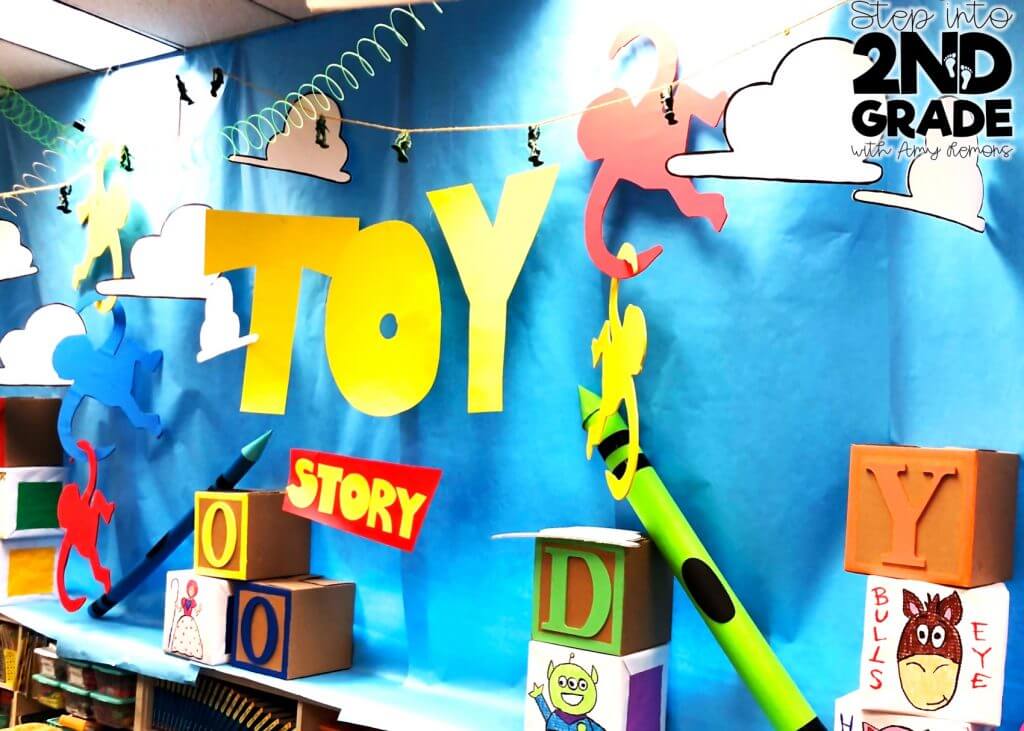
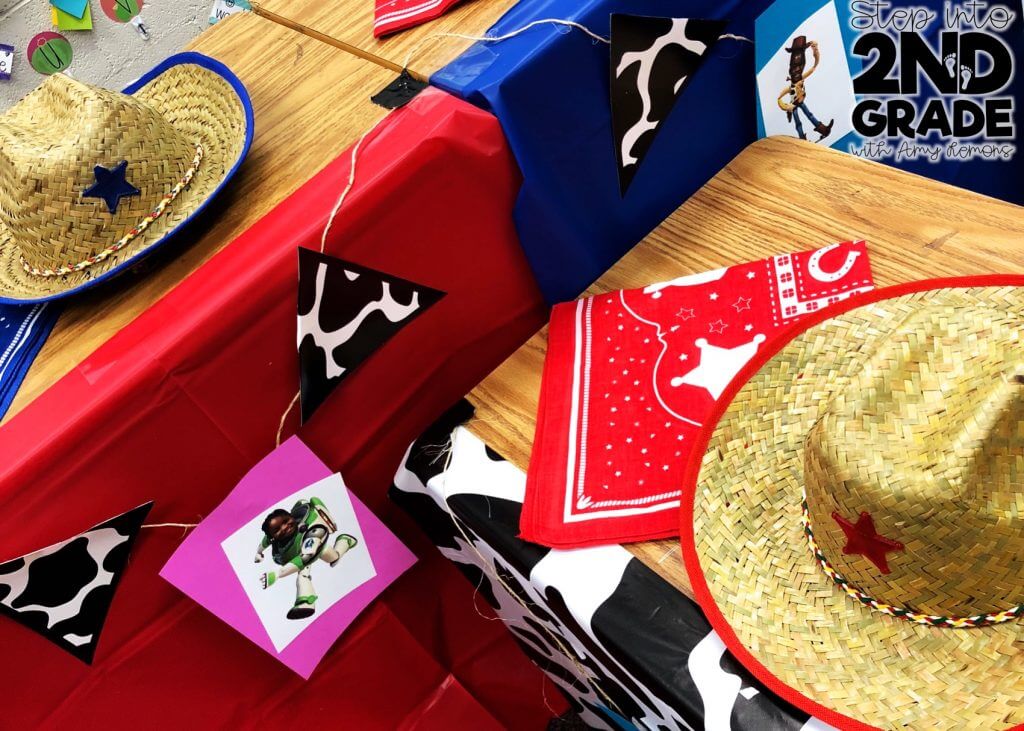
Kori and Chelsey both focus on the back wall of their classrooms when they do room transformations because it makes the most impact. They do not cover the entire room. That saves time and money. The back wall is what you see when you first walk into their rooms, so it just makes sense to focus their time and energy on that space. They use fishing wire and paperclips to attach everything to the ceiling tiles.
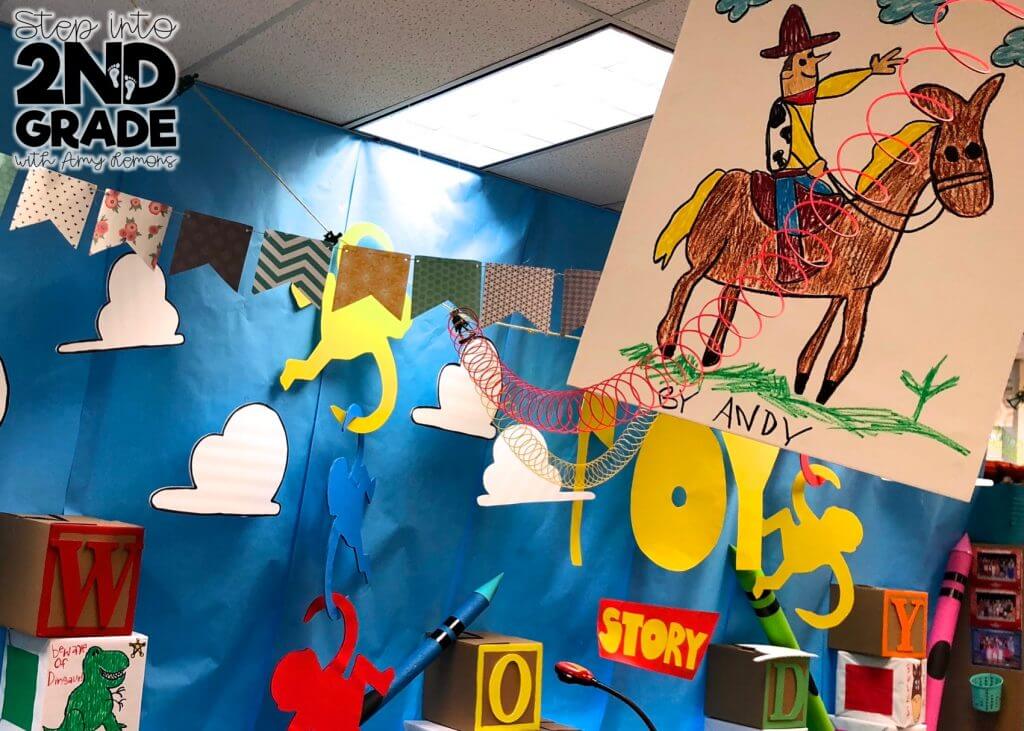
Hope was working on her room transformation at the same time, so it really helped to bounce our ideas off of one another. We decided to make some of Andy’s drawings on poster board… super cheap. You can find these drawings online (just google Andy’s room). I freehanded them, but you could also project and trace!
Kori covered the back of her room in butcher paper, which most schools have on hand! Then we draped slinkies and giant army men from the ceiling. Both of those were found at the Dollar Tree!
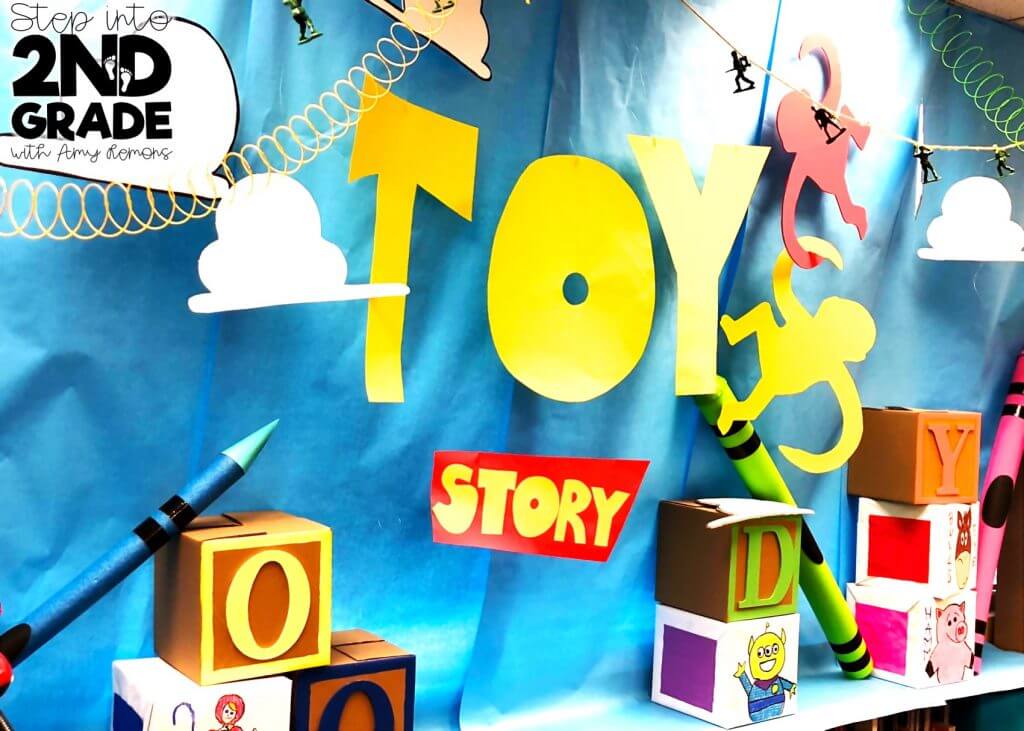
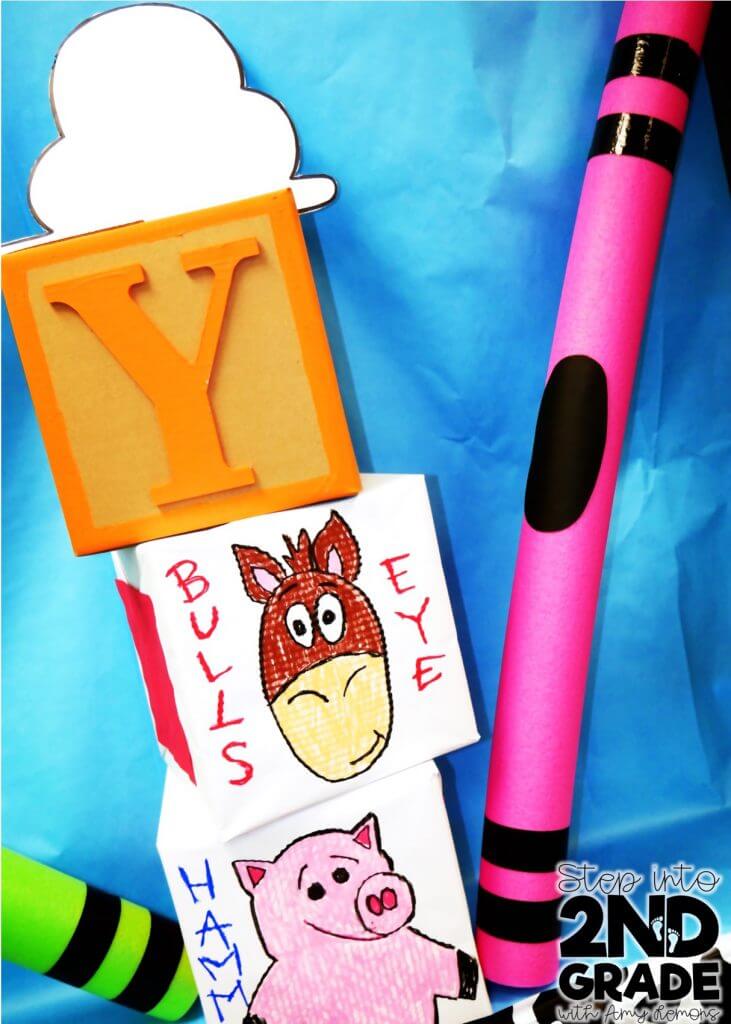
To make the large crayons I used pool noodles, duct tape, and party hats. All of those items can be found at Wal-Mart or the Dollar Tree as well!
The Toy Story Sign hanging in front of the backdrop is just yellow and red poster board from the Dollar Tree!
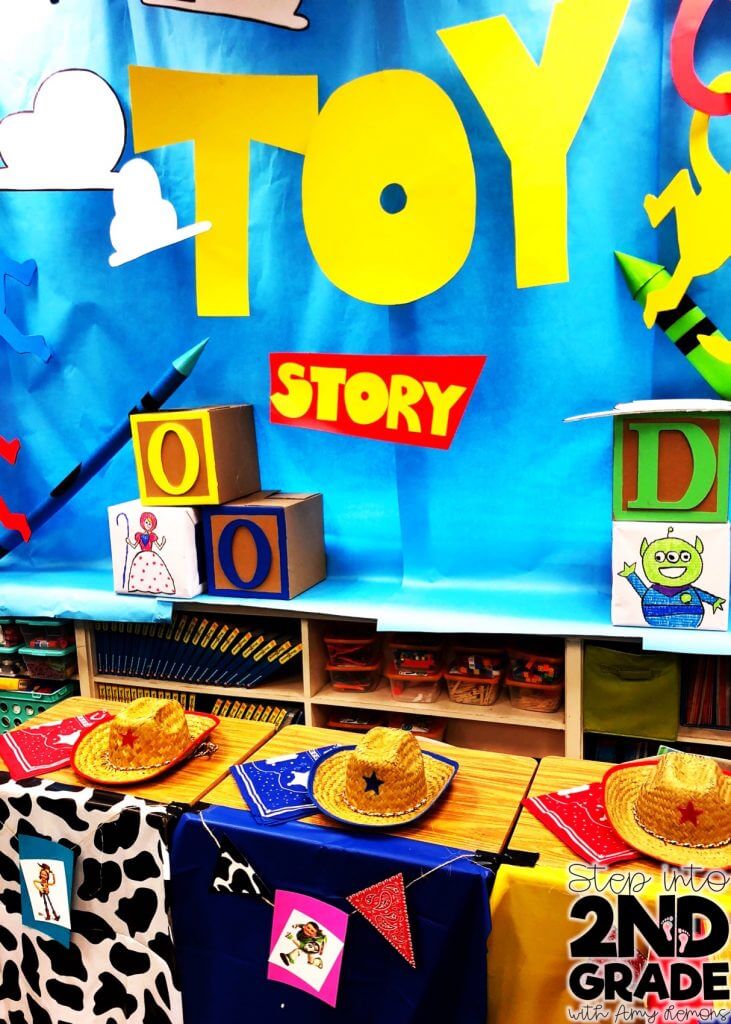
One thing that we did invest in were cowboy hats and bandanas. You can find those HERE on Amazon. {affiliate link}. That was our most expensive purchase, but they will be used year after year. You could also just pick up bandanas at Hobby Lobby for a fraction of the price. For the desks, we cut apart tablecloths and taped them to the front. If you have table groups, you can simply use the tablecloth like normal! Then we added pennants that Kori found at Hobby Lobby and pictures of the kids as Buzz and Woody. Their sweet teammate came up with that idea! They just cropped their faces on top of the pictures!
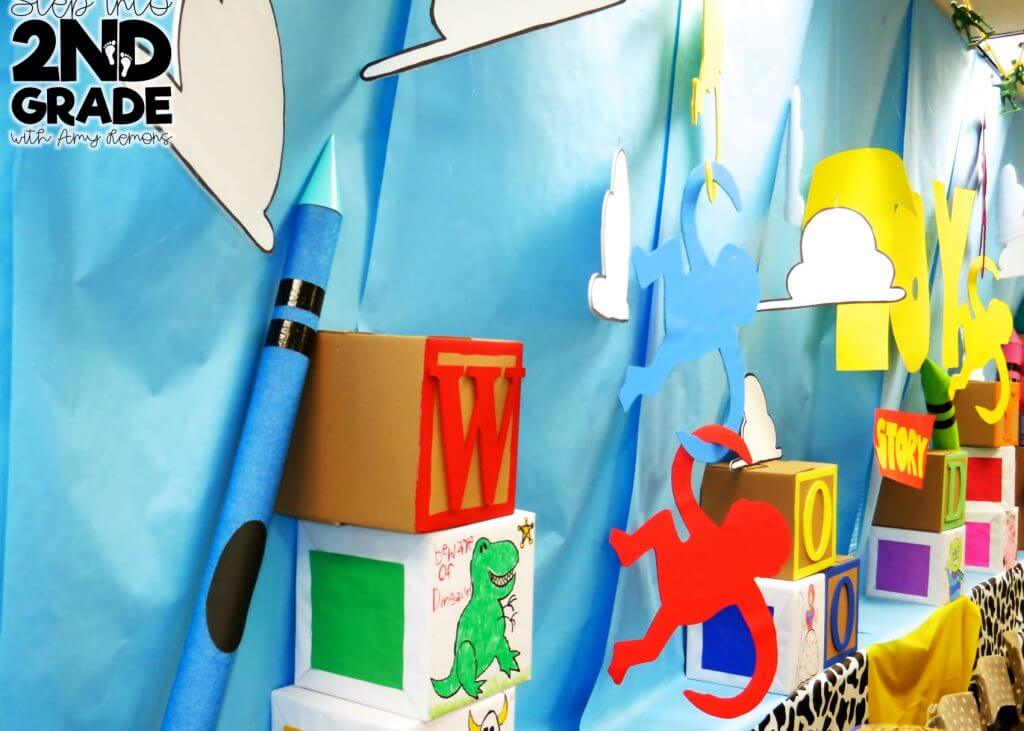
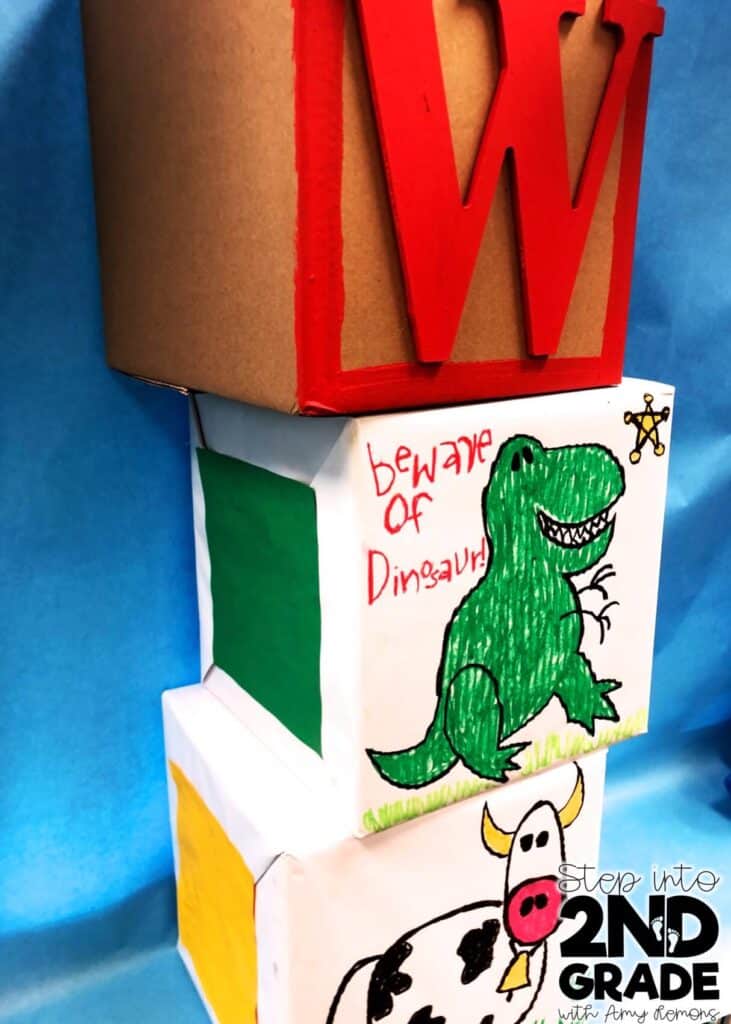
One way we saved A LOT of money was by using boxes upon boxes. Ask your school custodian if they would mind collecting boxes for you… you’d be amazed at how many boxes go in and out of a school each day!
I bought wooden letters from Hobby Lobby to spell out Woody (they didn’t have what I needed to spell out Andy). Joelle painted those for me and I hot glued them to the front of a box!
We used tablecloths EVERYWHERE because they are so inexpensive. I found the cow ones at Hobby Lobby, but you can also pick up regular table cloths at the Dollar Tree and Wal Mart!
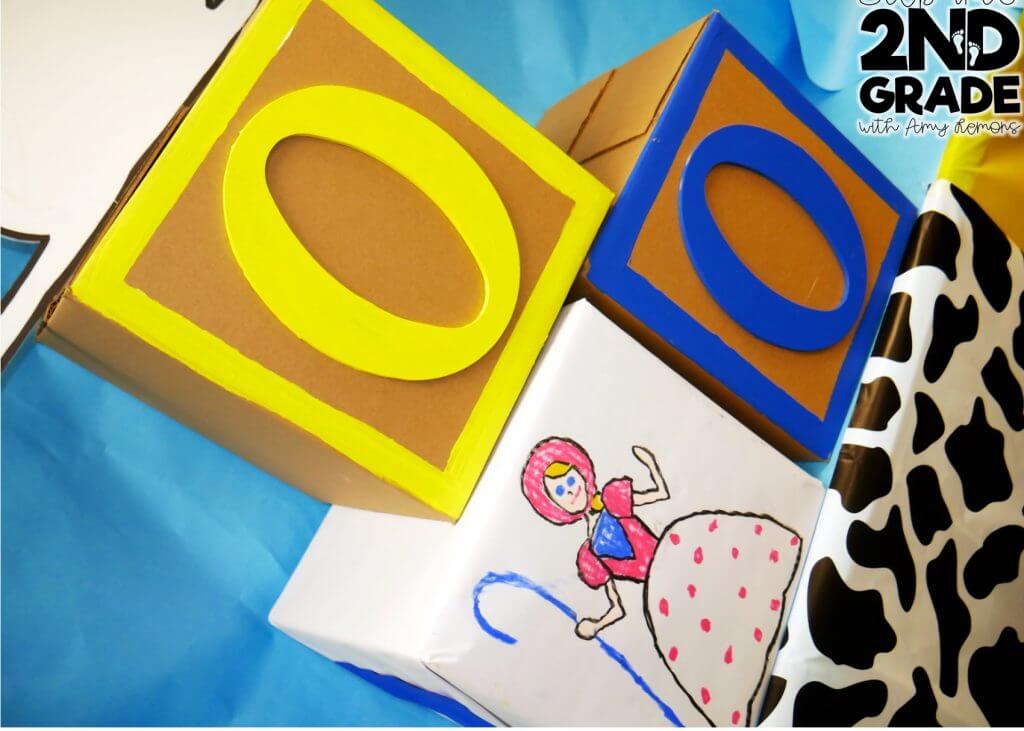
Then I covered 6 boxes in white butcher paper. I did some more of Andy’s drawings on those boxes just for a little extra pop. Definitely not necessary, but they added a lot to the room!
Kori made the monkeys out of foam board. You can project those and trace as well!

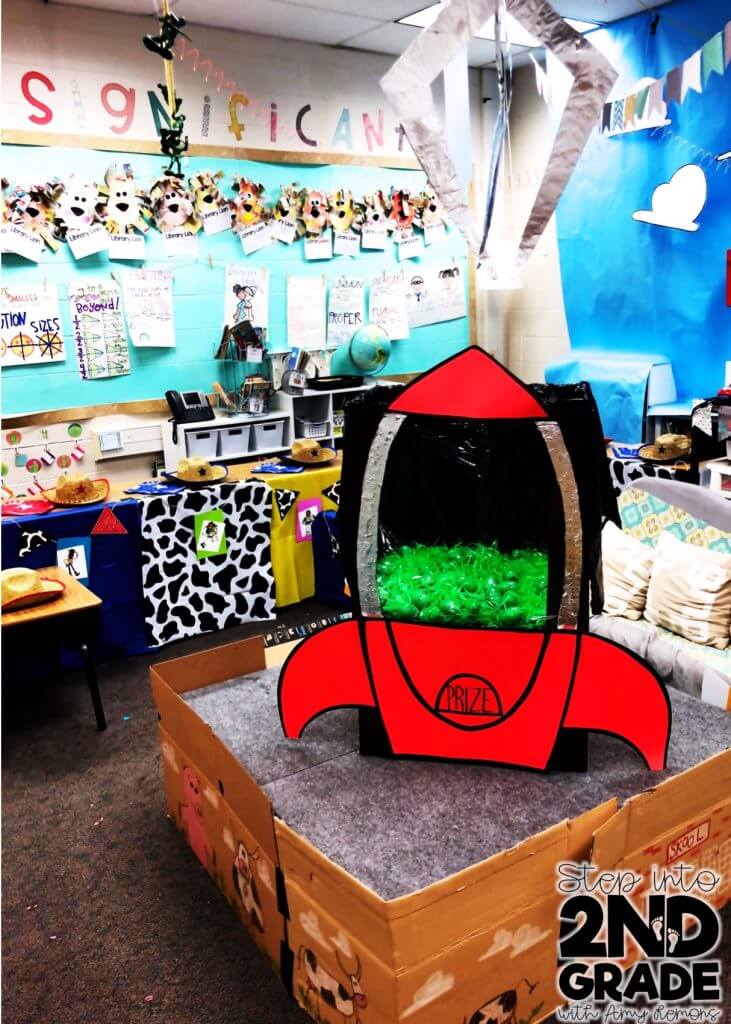
And last, but certainly not least, we made THE CLAW! I used poster board and foil… with the help of gobs of hot glue. Kori made the rocket out of a large Amazon box. She used poster board, foil, easter eggs, and easter basket filler to make the rest! Then she covered her stage with boxes and drew some scenes from Andy’s room on the front.
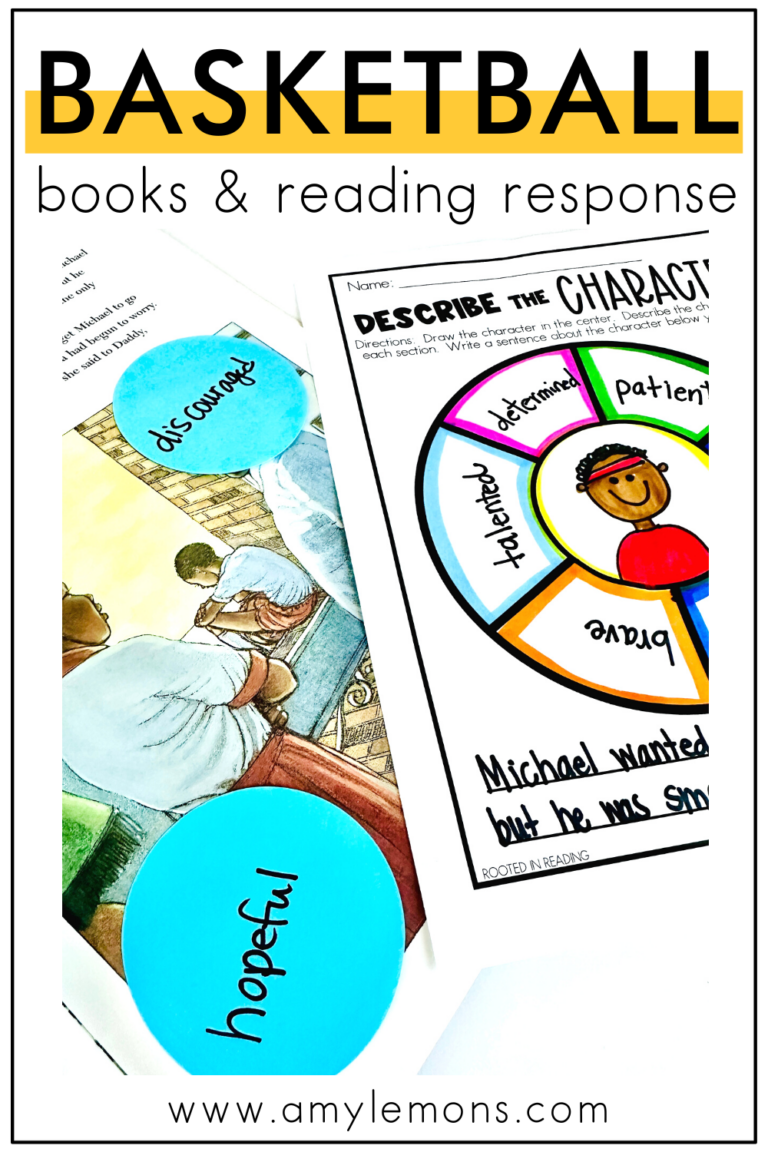
Now, what about content? I went in and did STEAM Mania with both of their classes BUT those activities are on tight LOCKDOWN because we will have a whole GYTO session over STEAM Mania starting in June!
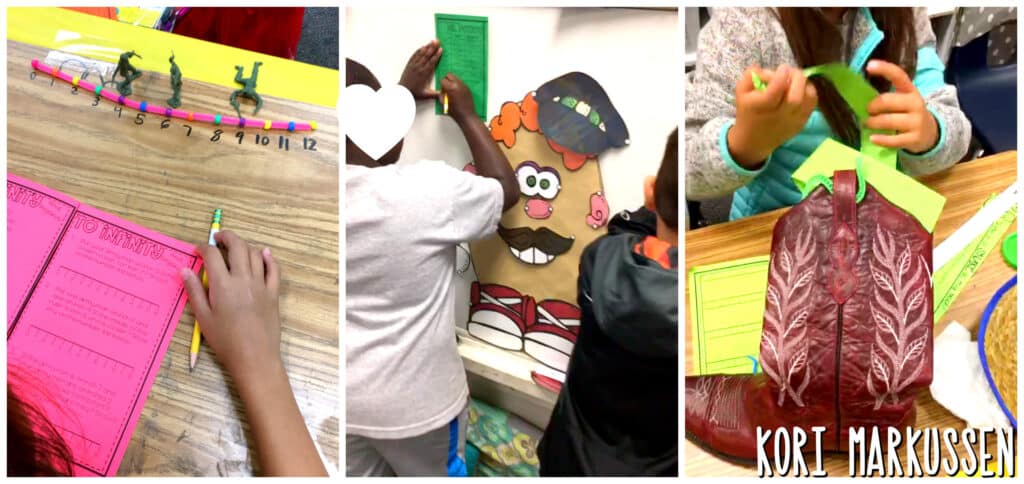
For Math, Kori planned Measurement Mania. They had been working on measurement for two weeks, so this was a wrap-up/review of the concepts learned! Do you know what the GREAT thing about this room transformation was? The kids were super ENGAGED the entire time. The math was rigorous and challenging, but every single kid nailed it because they were so excited to be at school! You can find her Measurement Activities HERE!
In the picture above you can see students working on their Measurement Mania activities. They made measurement intervals on a pipe cleaner and plotted the army men at different distances. Then they measured distances. Students measured the parts of Mr. Potato Head. After putting the potato head together, students measured the distance from one part to another. Students also completed “There’s a Snake in My Boot” activity where students drew out a description and created a snake from playdough. They added and subtracted lengths with that activity.
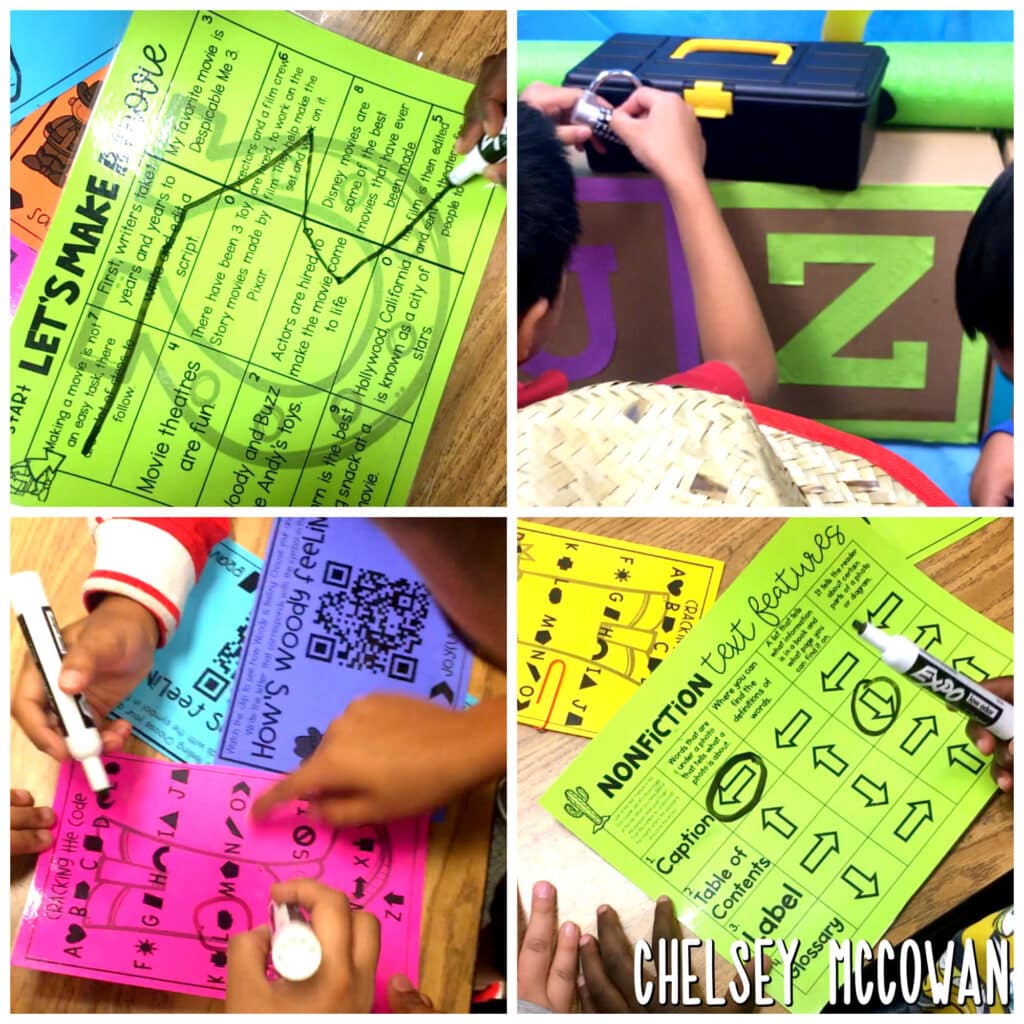
For Reading, Chelsey planned a Save the Toys Breakout. Students completed engaging tasks that involved main idea, nonfiction text features, context clues, and sequencing! Click HERE to find that!
Hey, y’all! My name is Amy Lemons and I am passionate about providing students with both engaging and effective standards-based Math and ELA lessons.
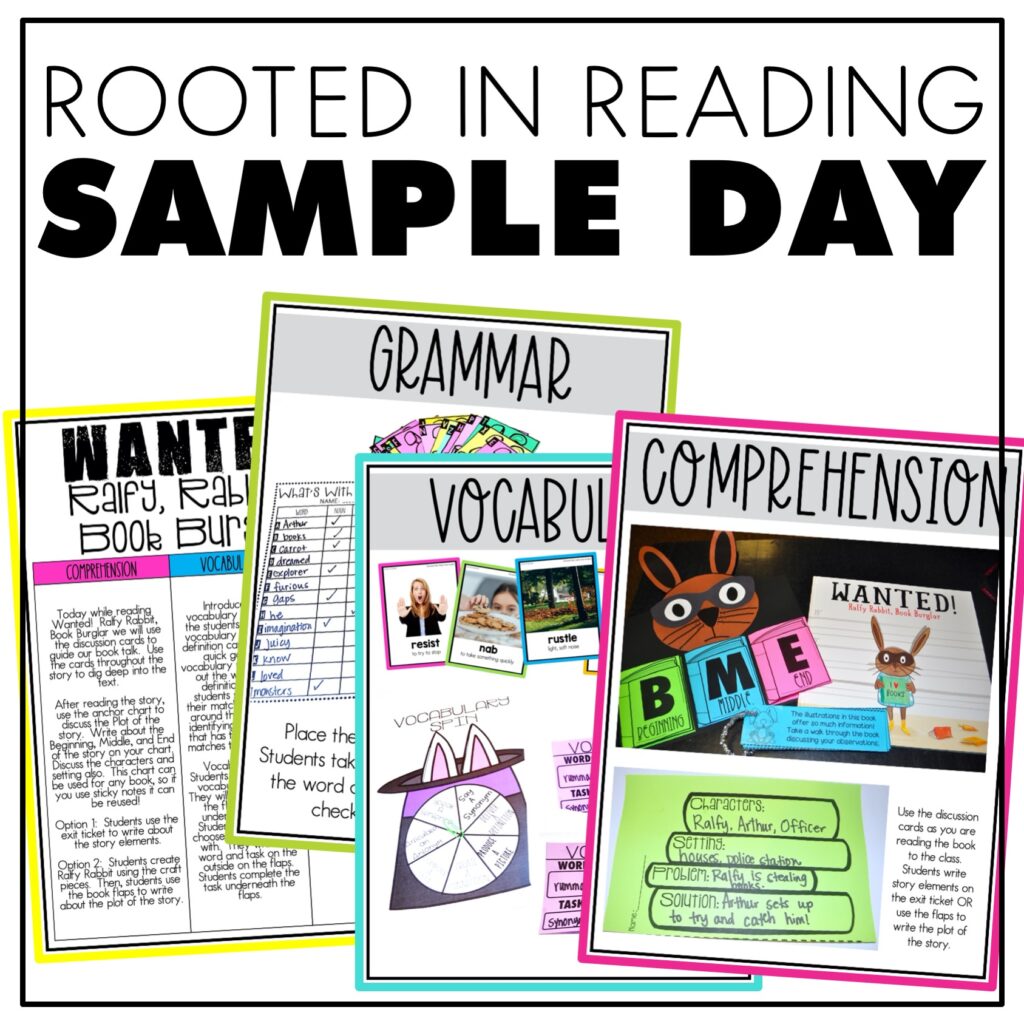
Sample a day of Rooted in Reading with these lesson plans and activities for Reading Comprehension, Vocabulary, and Grammar!


One Response
Oh wow! This looks amazing! I’d love to have seen the children’s faces when they stepped in! Reading this post was very interesting as, from the outset it looks very expensive, but it really isn’t. The pool noodle giant crayon idea is GENIUS!